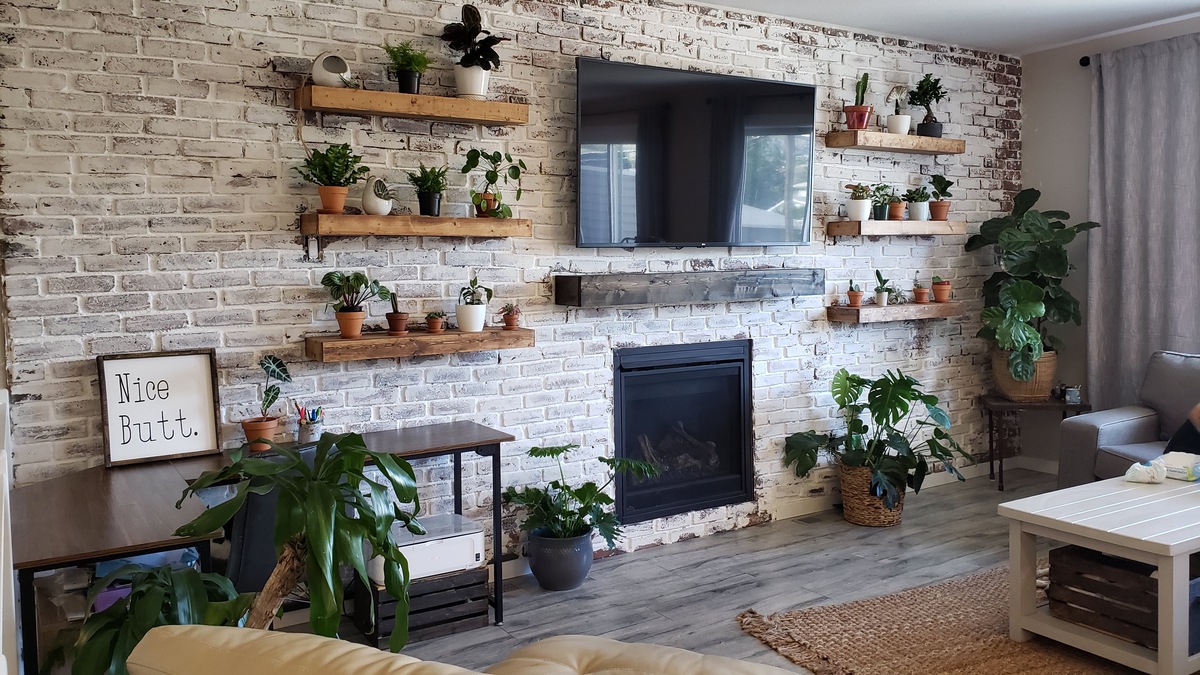
I love a good brick wall! They add a rustic-chic element that’s both timeless and funky.
We’re living in a new construction home in Kamloops and there happened to be a big, blank wall that needed some pizzaz, so recently I had a chance to build a faux brick wall myself!
At first, we weren’t sure what we were going to do with this wall. It had a fireplace, which we definitely wanted to keep. The fireplace was off-centre on the wall, leaving uneven amounts of blank wall space on either side. That made us scrap our original idea of creating built-in shelves.
So our next idea was to put floor-to-ceiling brick just around the fireplace, as a feature. While I was researching and looking for some DIY inspiration, I found that lots of people were creating full brick walls and whitewashing them, and I loved that! I figured, why not?
Deciding to do the full wall took it from about a $500 project to a $2,000 project, but I think it turned out pretty cool (despite it being pretty easy to make mistakes like these—and we definitely did learn a thing or two along the way, which I’ll share below!).
Building a faux brick wall
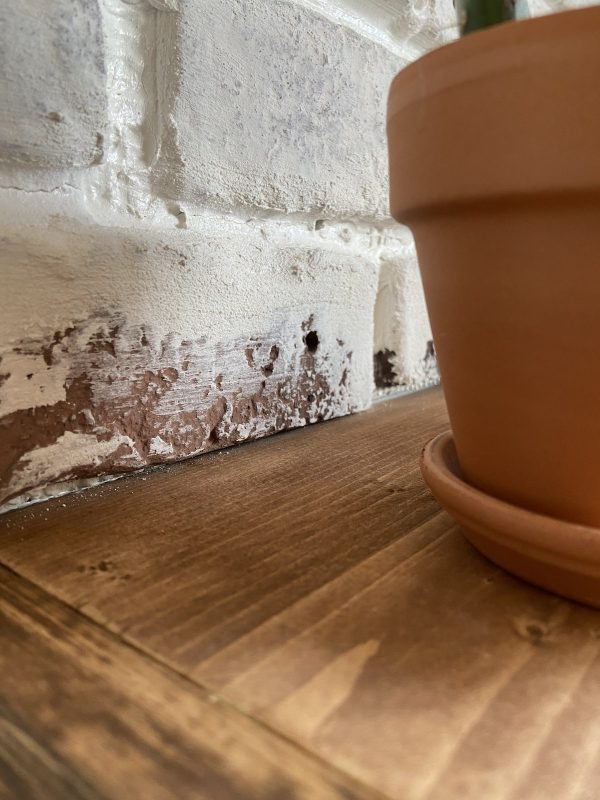
The whitewashing technique is often referred to as German smear. It’s a mortar wash that gives brick that rustic-yet-trendy aesthetic, and is often used on existing brick walls that are starting to look a little worse for wear or need an update.
Step 1: laying the faux brick wall tiles
We used these Soho Decorative Brick tiles from Rona to create the fake brick wall. They were actually a pretty good price! The tiles are placed on a mesh backing which is set to the wall with mortar. We knew we were taking a bit of a risk because in order to take down the tiles, the drywall behind it would have to be replaced. As you can imagine, we placed them very carefully!
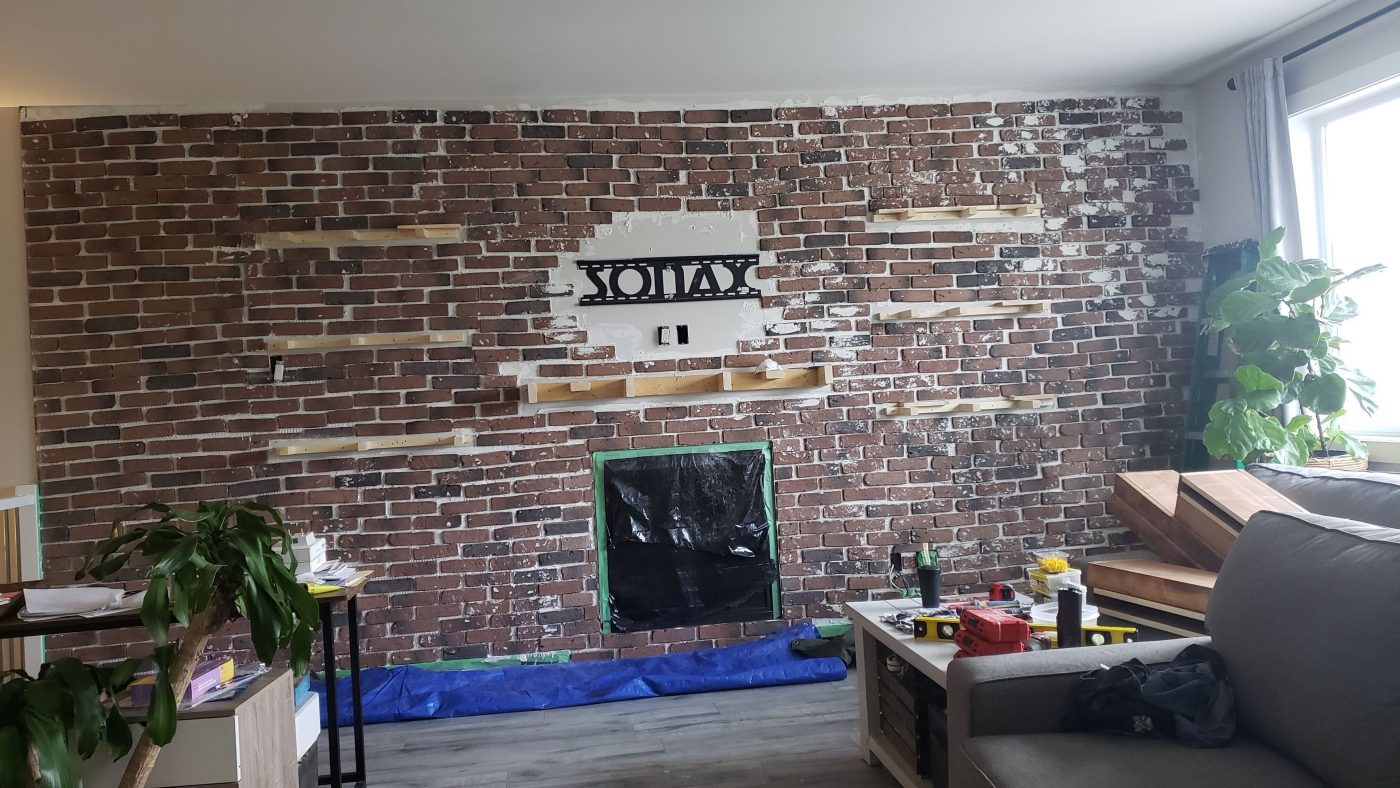
Step 2: filling in the gaps
So we tiled the whole wall and were left with some large gaps in between, which is the look we were going for.
Most of the tutorials we found were to whitewash brick walls that were already there, so no need to worry about filling in the gaps between the bricks. But because we used tiles, we had large gaps in between to fill.
Normally, you would grout in between the tiles at this point. This is one place where using fake brick tiles differs from regular tiles, and where we ran into our first hiccup.
Grouting was more challenging than we expected as the brick-like material is porous and it wouldn’t just wipe away easily afterward.
What I would recommend doing instead is using mortar (which is also used for the German smear ) instead of grout. And, if you’re going for a cleaner look with more of the red brick showing though, I would recommend applying it between the tiles with a piping bag or something similar.
Step 3: applying the mortar for the German smear effect
Next, we whitewashed the brick wall with mortar.
But again, be aware that you can’t just easily wipe excess off the bricks. You may need to go back and do some sanding if you want more of the red brick to show through.
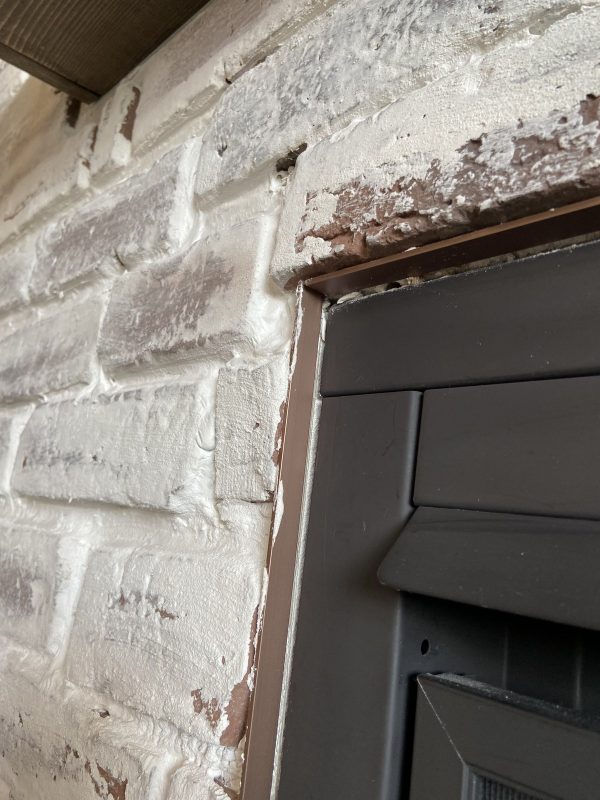
Step 4: brick wall edging
Something you don’t want to forget when building a diy brick wall in your home—the edging!
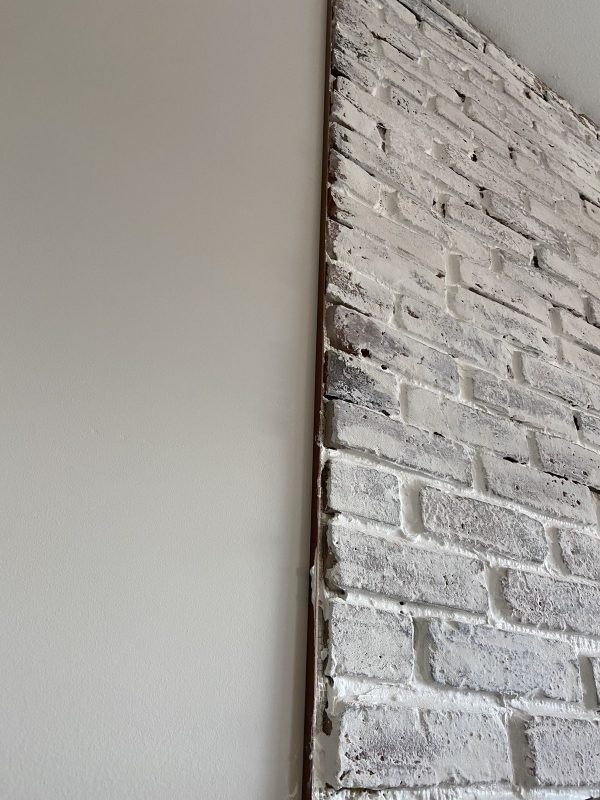
You’ll want to add this to the ends of your brick wall or else you’ll wind up with an unfinished, unprofessional-looking edge. Edging helps make it nice and clean!
Building the floating shelves
Building the floating shelves is actually what probably took us the longest of the whole project!
We actually created the floating shelves first so that we didn’t have to mount them onto the faux brick wall. We mounted them straight onto the drywall and bricked around them, instead.
We were hesitant about mounting the shelves to the brick and wanted to avoid cracking or damaging it. In the end, it seemed to work out well!
To build the floating shelves, we went to Home Depot and chose the cheapest wood there. The knots and dents were just the style we were looking for, anyway!

We mounted wooden L arms on the wall and made hollow boxes for the shelves. That way, the shelves just slide right on and off. So yep, they’re literally just floating there!
We stained the shelves with a ‘Special Walnut’ wood stain and we stained the mantle a darker shade called ‘Dark Walnut’ as we wanted to make it more of an accent piece.
Decor from local shops in Kamloops
And of course, the project wouldn’t be complete without some decor! Anyone who knows me knows that I love plants, so naturally, we added a few. I purchased most of them at shops right here in Kamloops like Art Knapp and Far and Wide.
There you have it! We are really excited to finish the rest of the home renovations and see the final results.

If you’re looking for the perfect Kamloops home, I’d love to chat and see how I can help! As a Kamloops REALTOR®, helping my clients find the ideal property is what I’m all about.